Welcome to Evidence Me – Quick Start Guide!
The information below will help you get quickly started with your Evidence Me account.
Step 1: Download the App
The Evidence Me app for Android and iOS can be downloaded by clicking one of the icons below.
![]()


Download the App from your device’s App Store
-
- Visit the App store on your device and search for Evidence Me by 2Simple
- Follow the steps to download the app

Log in to the app
-
- Open the app on your device
- Enter your Email and password
- Tap Login
- The following pop-up message will appear:
- “Evidence me” Would Like to Access the Camera – Tap OK
- “Evidence me” Would Like to Access the Microphone – Tap OK
- Would you like to save this password to use with apps and websites? Please Note: If you are using a shared iCloud account we would recommend clicking Not Now
- Do you want to set a PIN? we recommend that you select OK to keep your app secure (you can select No and set this up at a later date).
- Press OK
Step 2: Add User Accounts

PLEASE NOTE: Only Admin Users can set up new users.
-
- Log into the Evidence Me Web Suite using your Admin user details
- Click on the menu icon
 in the top left-hand corner
 - Click Admin
- Click on your organisation name
- Click the
 icon under organisation users
 - Enter the user’s email address
- Enter the user’s first and last name
- You can type the user’s display name in manually however you can leave this blank and it will automatically display as the user’s full name
- Leave the Password fields empty
- Select the User Type (you can add more than one user type for example Organisation Admin & Organisation Staff)
- Organisation Admin – only able to access the Administration area
- Organisation Staff – only able to access Evidence Me
- Leave the Activate Account box unticked
- Click Create
A welcome email will automatically be sent to the user to set up their own password and activate their account (please note this email is only valid for 30 days before it expires).
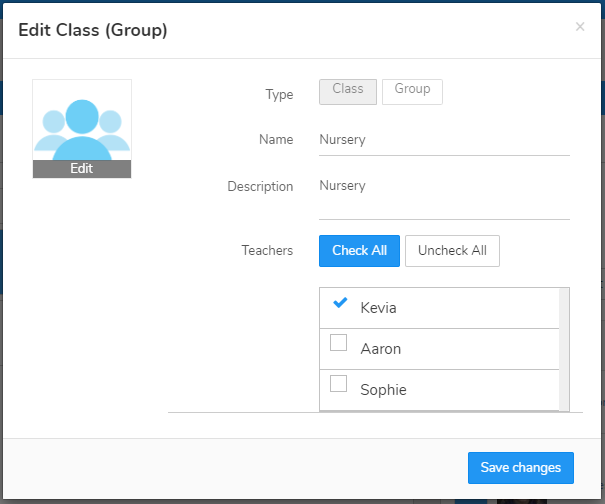
Assign Users to a class
When Using the mobile app the user will only be able to add learners and view learner profiles from the classes that they are assigned to. Therefore, when you add a new user you must assign them to the classes that they need to have access to. Follow the steps below to add a user to the classes that they need access to:
-
- Log in to your websuite
- Click Learners
- Select a class so that it highlights in blue
- Click on the edit icon
 along the Classes bar
 - Next to Teachers check the teachers who need to be able to access this class
- Click Save changes
Step 3: Add Classes & Learners
-
- Log into the Evidence Me Web Suite
- Click Learners Portfolios
- Click the
 icon on the Classes bar
 - Enter the name of the class
- Put a tick next to the teacher’s name(s) who needs access to the class
- Click Create

Upload Learners on the Web Suite
PLEASE NOTE: Only Admin Users can upload classes and learners using CSV files.
CSV File
Copy and paste the learner’s details into an Excel document (edit an Excel document you already have) in the below exact format ensuring to complete all of the mandatory fields in order for the file to successfully upload:
-
-
- Email (nonmandatory field) – Parent email address
This field can be left blank if you are not using the Parent Share feature however please do not delete this field as it needs to be included for the file to be recognised - Forename (mandatory field) – Learner’s first name
- Surname (mandatory field) – Learners surname
- DOB (mandatory field) – Learns date of birth in the following format 01-Jan-20
- UPN (mandatory field) – Learner’s Unique Pupil Number
If you do not have UPNs for your learners then please add temporary UPNs consisting of a unique sequence of letters/numbers e.g. for Reception class, temporary UPNs could be: R1-001, R1-002, etc; for Nursery class, temporary UPNs could be: N1-001, N1-002, etc. ensuring to use a completely different UPN for each learner that is uploaded on to your account
PLEASE NOTE: If you plan to create temporary UPNs and update these at a later date they will need to be individually updated as they cannot be updated in bulk.
IMPORTANT: The system matches learners by their UPN so uploading a learner with the same UPN as another learner will update the existing learner’s information (name, DOB, etc) rather than creating a new learner.
- Email (nonmandatory field) – Parent email address
-

Click the Excel icon below to download CSV class template.
Save the file on your computer as a ‘CSV (comma-delimited)’ file.
TOP TIP: We recommend that you create a separate CSV file for each class and upload them individually. If all class lists are uploaded using one CSV file each learner will have to be individually moved to the correct class.

To upload your CSV file to your Evidence Me account, please follow the instructions below:
-
- Log into the Evidence Me Web Suite
- Click Learners Portfolios
- Click the class name you wish to upload the learners to
- Click Upload Learners
- Click Browse
- Select your CSV file
- Click Upload

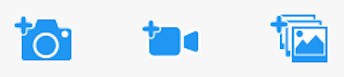
Step 4: Create an Observation
For each observation, you can capture evidence. This could be an activity or a piece of work.
Tap on one of the below icons on the app Create screen to start your observation
 Photo
Photo
-
- The photo will be instantly captured
- Edit your image using the image edit features – Please Note this feature will only appear if you have switched on Enable Crop Screen in the Settings area of the app
- Tap Done in the bottom right-hand corner
- Select Tap to Edit
TOP TIP: Your observation will automatically appear on your recent observations bar so you can always edit it at a later date.
 Video
Video
-
- The video will automatically start recording
- Click on the stop button
 to stop the recording
 - Click Tap to Edit
TOP TIP: Your observation will automatically appear on your recent observations bar so you can always edit it at a later date.
 Existing photo/ video
-
- Your device gallery will instantly open
- Select the image(s) you would like to upload (max 10)
- Click Select in the top right-hand corner
 Continue without evidence
-
- A blank observation will automatically open
Photo Face Blurring
The face blurring tool lets you easily customise the photo, to ensure that you meet all of your privacy requirements.
-
- Open on the observation
- Tap on the image
- Tap on the blurring icon
 in the bottom right-hand corner
 - Tap an area on the photo to blur it. Keep your finger pressed down on the screen to increase the size of the blur area.
- Tap Done
- Tap Save
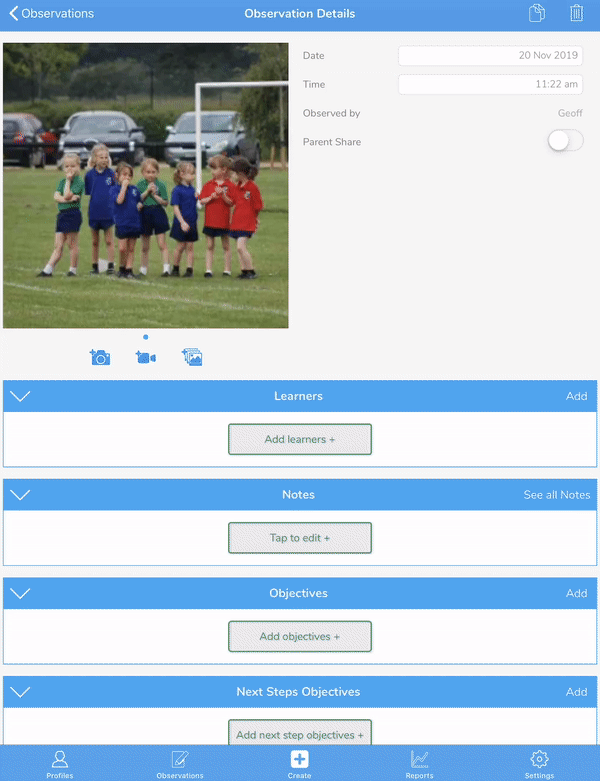
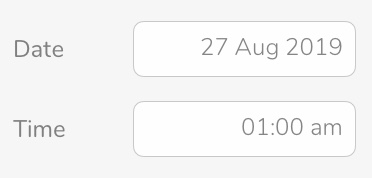
Add Observation Details
-
- Tap to edit an observation
- Click to amend the date and time (if required)
- Tap on one of the icons below the image to upload more evidence
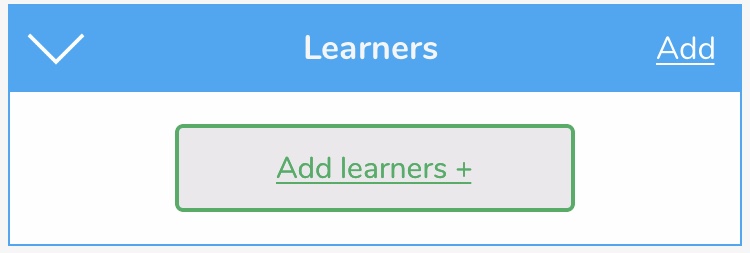
- Tap Add Learners +
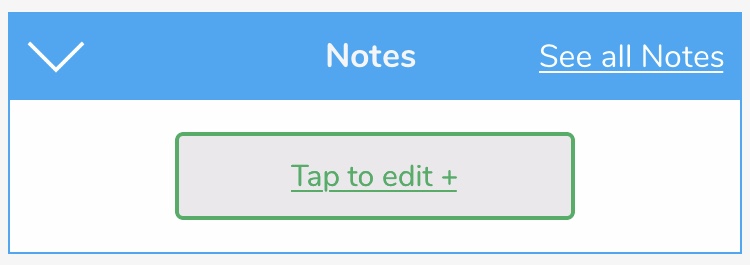
- Tap Add Notes +
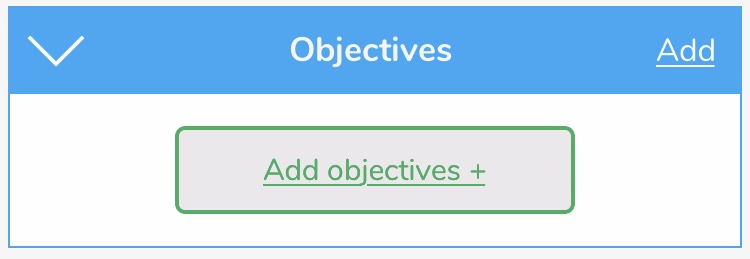
- Tap Add Objectives +
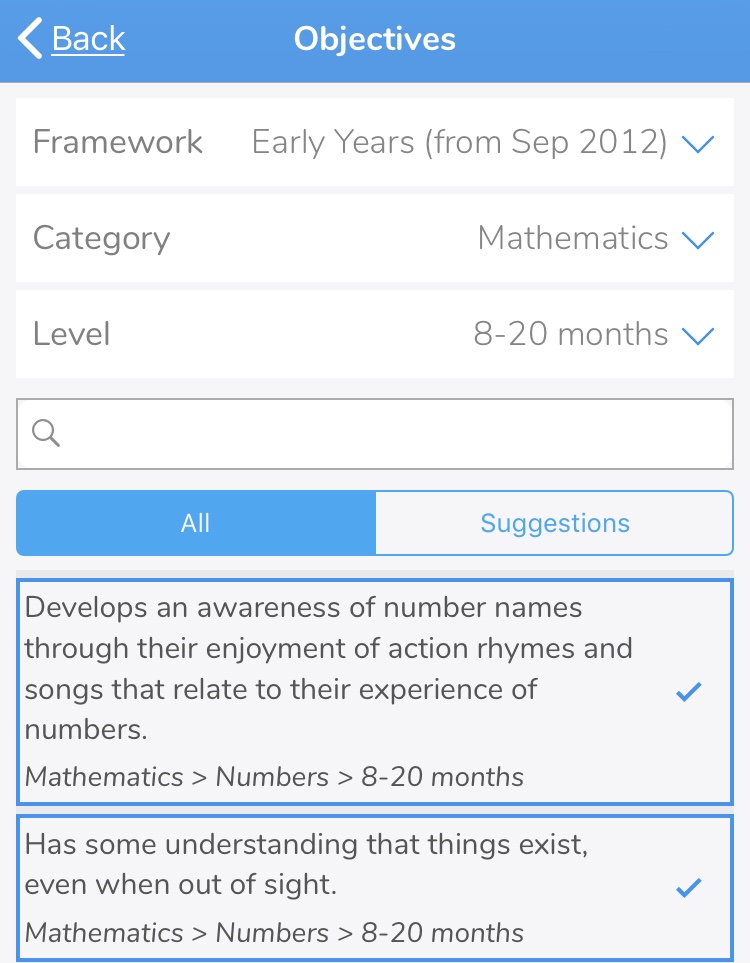
- Use the below options to find objectives:
- Use the dropdown filters (Framework, Category, Level)
- Use the search bar to type in a word or sentence
- Tap Suggestions – the app will suggest objectives that match the notes you have entered for this observation
- Tap on objectives so that a blue tick appears on the right-hand side to add it to the observation
- Tap Back (there is no need to click save as all observation data is auto-saved)
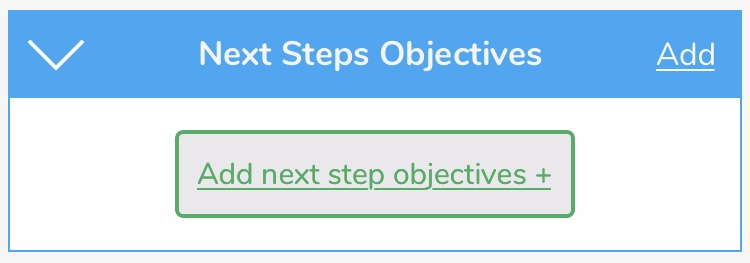
- Tap Add Next Steps Objectives + and follow the same steps above (objectives that have been added will be highlighted in purple)
- Use the More feature to set your observation as a Draft
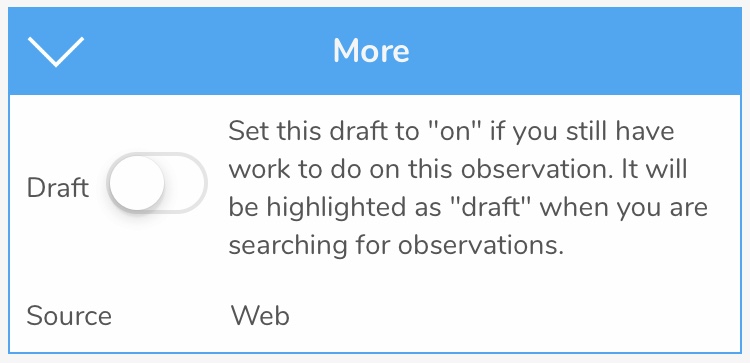
- Select observation for Parent Share – please note once you have selected an observation for Parent Share the observation will be shared with parents within the next few minutes

Observations will automatically be uploaded to your Web Suite as long as your device is connected to wifi. This is indicated by a green dot appearing in the top left-hand corner of the observation thumbnail.
Observations with a red dot in the top left-hand corner have not yet been uploaded and will upload as soon as your device is connected to a good wifi connection.
PLEASE NOTE: If you have any issues connecting via the app or web suite please check your proxy settings.