From the websuite Learners page, you can edit your classes and learners. Here you can edit class information, add new learners, and/or make any changes to existing learner details.
Modify Classes
-
- Login to the Evidence Me Web Suite
- Click Learners
- Click the class name so that it highlights in blue
- Click on the Edit icon
 on the Classes bar
 - Update the class information
- Click Save Changes
Modify Class positions
The system automatically orders classes alphabetically. If you wish to order your classes in another way please follow the below steps:
-
- Login to the Evidence Me Web Suite
- Click Learners
- Click and hold on the blue tab next to the class name

- Drag and drop the class into its preferred position
Once classes have been placed in their new position they will update to this position in the app.
Individually Modify Learners
-
- Select Learners
- Select the class
- Click the learner’s UPN number or DOB, so that the row highlights in blue
- Click the Edit icon on the Learners bar
- Make any changes to the learner details
- Click Save changes

Bulk Modify Learner’s Information
You can add/ update the learner’s information such as DOB and parent email addresses by downloading and re-uploading a CSV file containing this information.
PLEASE NOTE: Learner’s UPN numbers cannot be added/ amended using this method. The system matches existing learners via their UPN’s so if the UPN is changed/ amended using this method the system will create a new account for the learner(s) rather than update the existing learner information
Download learner CSV File
-
- Click Reports
- Click Learner List (CSV)
- Step 1 – Not required
- Follow Step 2 and select your class
- Click Apply
- Tap Step 3 to generate the file
- The CSV file will generate in Step 4

- Click on the CSV icon under Options to open the file
- Save the file to your computer
- Make any changes to the file such as adding parent’s email addresses, learner’s DOB, etc.
IMPORTANT: The system matches existing learners via their UPN so this must stay the same and cannot be amended. If the UPN is changed/ amended in the file the system will create a new account for this/ these learners rather than update the existing learner information - Save your file changes
Reupload learner CSV File
-
- Click Learners
- Click on the class name
- Click Upload Learners
- Click Browse
- Select your CSV file
- Click Upload

The system will update the existing learner’s information by matching their UPNs and updating any amended/ newly added information.
Adding a Profile Picture
-
- Select Learners
- Select the class
- Click a learner’s UPN number or DOB, so that the row highlights in blue (please don’t click directly on their name as this is a hyperlink to their observations)
- Click the Edit icon on the Learners bar
- Click the Edit button on the image icon

- Select Browse to choose an image from your files or drag and drop an image into the Drop files to upload box
- Crop the image so that it fits the box
- Click Upload
- Click Save changes

Adding Tags
You can add tags to the learners to use for reporting such as girls, boys, SEN, etc.
-
- Select Learners
- Select a class
- Click the learner’s name so that it highlights in blue.
- Click the Edit icon on the Learners bar
- Click in the Tags field
- Type a tag title – if this hasn’t already been created click Create option “…” to add this tag
Adding Groups
Within your classes, you can add groups to use for reporting, such as Red Group, Blue Group, etc.
Follow the below instructions:
-
- Select your class
- Click the add sign
 under Classes
 - Make sure Group is selected.

- Name your group
- Select the teachers to assign to this group
- Click Create
- Click the plus icon under the class name to view your group(s)
- Drag and drop learner’s names to copy them into the group

Moving and Copying Learners
You can move learners between classes and copy learners into different groups so they appear in multiple areas.
Follow the below instructions:
-
- Select your class
- Select your learner by clicking on the UPN number (don’t click their name as this is a hyperlink to their profile)
- Click and hold on the blue tab next to the learner’s name
- Drag and drop the learner into the class
- A message will appear asking whether you would like to Copy or Move the learner

TOP TIPS:
-
- Click Select All to move all learners in one go
-
Select multiple learners by clicking on each UPN then drag the selected learners by “clicking and holding” the blue tab
 next to one of the learner’s names
 - Select Copy– the learner and all their data will stay in the current class but also appear in the class you have copied them to (this can be done for multiple classes).
- Select Move– the learner and all their data will move to the selected class and no longer appear in the current class.
- Click Select All to move all learners in one go

Archiving Old Classes
-
- Click Learners
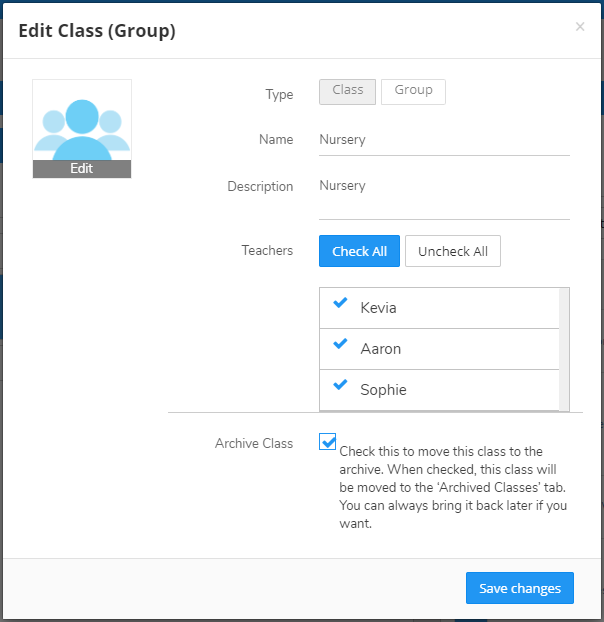
- Click on the class name you wish to archive
- Click the Edit icon
 on the Classes bar
 - Put a tick in the Archive Class box
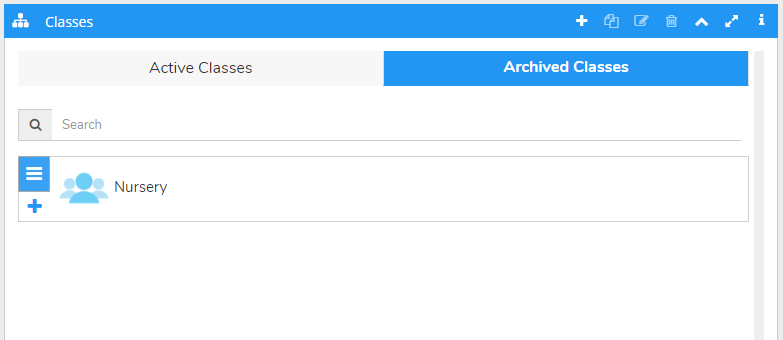
- Click Save Changes
This class will then be moved to the archived classes folder and with remain accessible from the websuite.
Deleting Learners
-
- Select your class
- Select your learner
- Click on the Bin Icon
 on the learner bar
 - Click Delete
The deleted learner will be sent to the Unassigned Learners folder under “classes”. To permanently delete the learner click “Unassigned Learners” and follow the same process as above.
Deleting Classes
-
- Select your class
- Click on the Bin Icon on the classes bar
- Click Delete
The class will disappear but the learners will be sent to the Unassigned Learners folder underclasses. To permanently delete the learner click “Unassigned Learners” and follow the same process as above.