At the end of your school year, it’s an ideal time to clear off your capture devices and get your classes ready. Just follow this simple process to make sure you’re ready for when the new school year starts!
Add or modify class lists
Manage your classes on the web suite
-
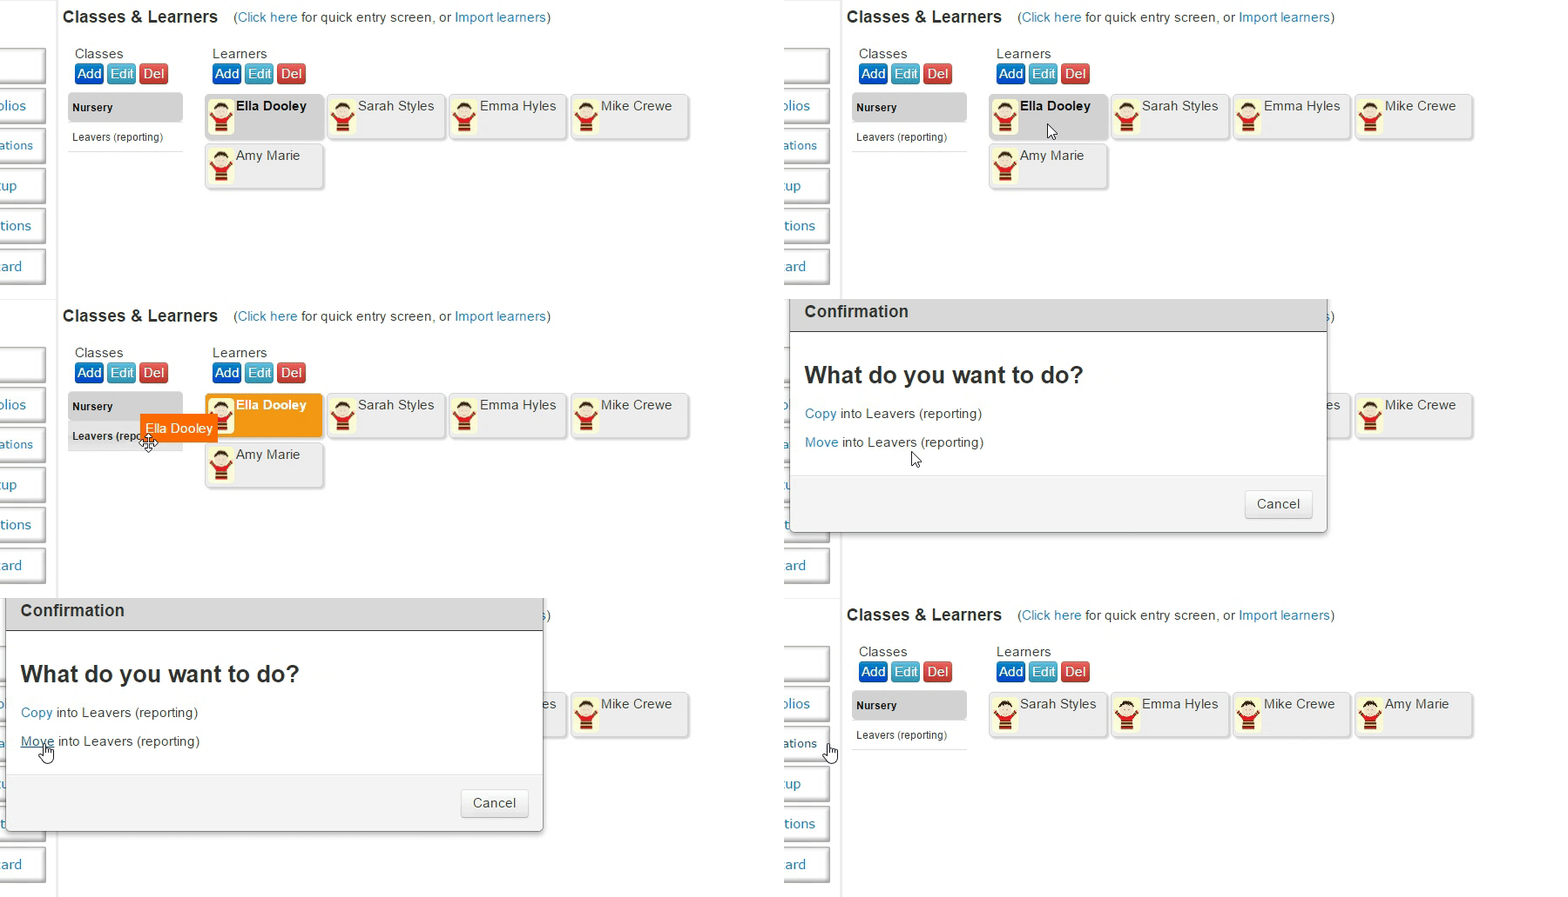
- Create your new class structure by renaming existing classes when possible (e.g. Rename Nursery to Reception).
- Delete, move or add learners as appropriate – delete or drag’n’drop learner names into their new classes.

CSV
You can now upload your new classes using the new CSV upload feature. Click here to download our CSV template and instructions. To upload the CSV template, please follow the below instructions:
-
- First, input your class information into the CSV template.
- Log into your websuite
- Please click on Class Setup to view your classes.
- Click on Class Setup and then click on the ‘Import Learners’ tab
- Please click the ‘Choose File’ button and select your CTF File
- Click ‘Upload to 2Bap’ button
Your new classes will now be visible in the Class Setup section.
CTF
-
- First, generate a CTF file from your SIMs system or similar. Please ask your school administrator for this
- Please click on Class Setup to view your classes.
- Click on Class Setup and then click on the ‘Import Learners’ tab
- Please click the ‘Choose File’ button and select your CTF File
- Click ‘Upload to 2Bap’ button
The new classes will appear on the Class Setup page.
When generating a CTF file you should only include classes that you wish to add and/or update learners in 2Build a Profile. The CTF file will need to include the following information for each learner:
-
- First Name
- Last Name
- DOB
- UPN
- Gender
- Year Group
- Primary Contact email address (if Parent Share module in use)
If you do not have the system to generate a CTF file please follow the link below for alternate ways to add in your new learners.
For more information on how to modify class, lists click HERE
Archive Leavers Data
If you want to save data for children you no longer teach on the web suite, create a new group called “Leavers (reporting)”. Then drag’n’drop the learners into that group. (Reporting groups will not appear on your devices, but data will still be available on the websuite for you to access should you need it). Tap “Save Changes”.

For more information on how to Archive your learners, please click HERE to view our help video!
Reset App
We recommend this is done once a term to keep the App running smoothly!
Make sure that all observations are completed and on the Web Management Suite- you can check this in ‘Observations’ on the websuite. The green dots on observations in the app indicate a successful upload.

PLEASE NOTE: Resetting your device will clear off all data so that observations will no longer appear on your device, however, this will remain securely stored on your websuite. This will help to create more storage within the app which will help the software to run more smoothly. It will also avoid any confusion searching through old observations.
To re-set your app…
-
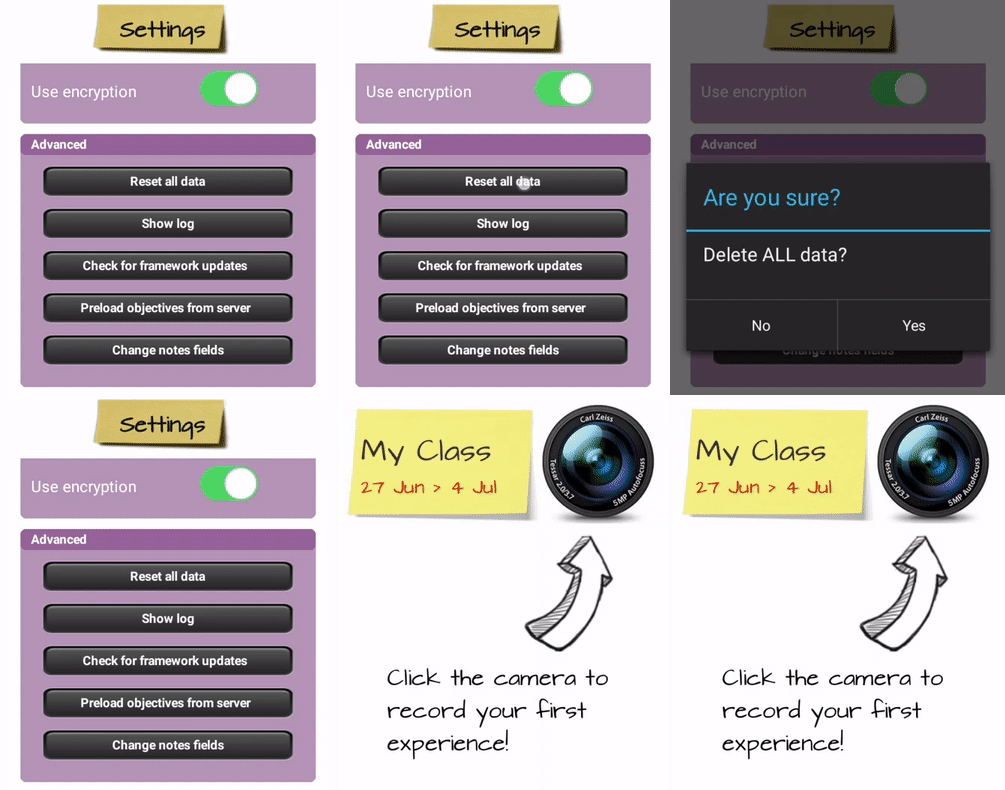
- Open the app.
- Go to settings.
- Tap “Reset all data”.
- RESTART THE APP.
- Enter your account details and tap log in (the app will have reverted back to the original login details ‘user_eyfs’)
- Set “Use multiple devices” ON.
- Set “Use as master device” OFF.
- Tap “Back”.
- Tap on “My Class” to go to the classes and learners page.
- Tap on “Refresh” to load your new class details.
- Update your Frameworks
Update your Frameworks
To ensure you are using the most up to date frameworks, please follow the steps below on each device:
-
- Make sure that you have a wifi connection
- Go to settings
- Tap on “Log in” – you should receive a message back saying “Success”
- Tap on “Check for frameworks updates” – you should receive a message back saying “Synchronising” (let me know if it says anything else)
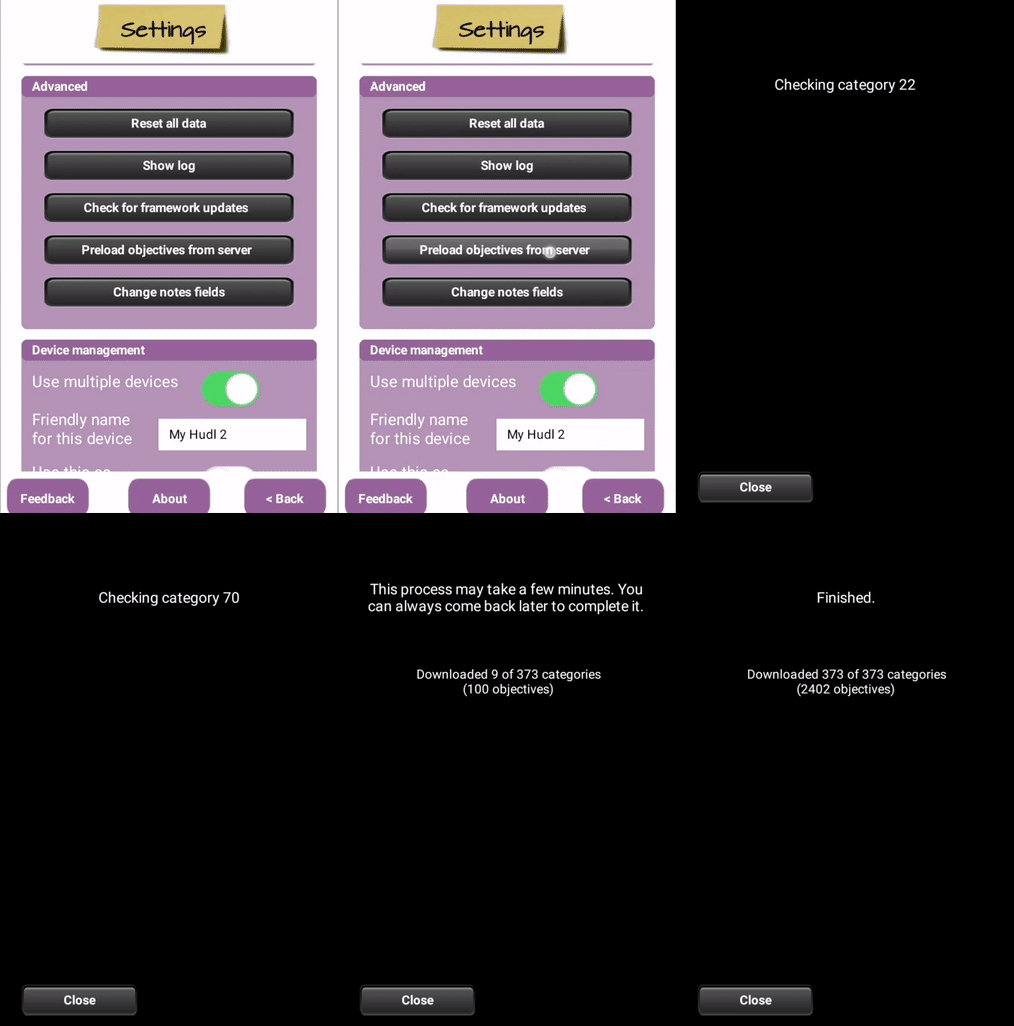
- Tap on “Preload objectives from server” – This should start checking and then loading categories. Please make sure the total number of categories is complete- if the process stops counting up and freezes tap ‘close’ then ‘preload objectives from server’ again. This will download any remaining categories.

Once this has finished the objectives should be updated and stored in the app.
Only tap on the “check for framework updates! and “Preload objectives from server” if instructed to do so by support.
Please click HERE to watch our End of Term help video for further information and guidance on how to set up your App ready for September!